I film a lot of Documentary work. This kind of work, in a nutshell, can be summed up as: “Get the best shot, with little to no preparation, in as little time as possible. And oh ya, you get one chance to get it right.” How’s that for a day job?
Today I thought I would share an example with you of an interview I did and discuss some of the challenges and how I dealt with them under the time pressure.
The Scenario:
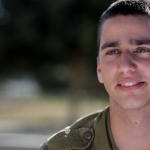
I was given a soldier to interview and we had him for a very limited time. I was given just a few short minutes to interview him and my job is to get the best looking shot within those few short minutes.
The Challenges
Challenge number one is the lack of time to look around and test out areas that would give me good lighting on the subject and good lighting on the background.
Challenge number 2 is that I am outdoors where the sun can create strong unattractive shadows on the face and make my subject squint as well.
Challenge number three – and this is the curve ball – I was told that we needed to interview him sitting down and even looking around for chairs at the last moment wasn’t an option. A chair would have given me the flexibility to sit the subject where ever I may need him (The chair you see in the shot was introduced mid-interview)
Deal With It
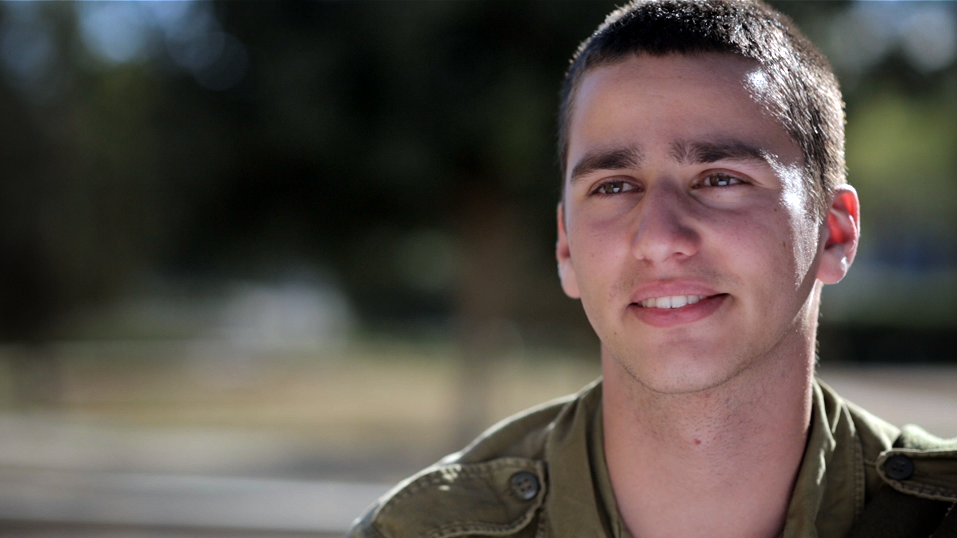
Step number one – deal with the factors that you cannot change. In this case that meant I would sit him on the step that you see in the shot. This choice was basically made for me. I chose to put him not e bottom step so he would be eye level with the interviewer in the red shirt. I basically had 180 degrees of options for which way he could face the camera. I could have had him look into the sun or have the sun behind him or anything in between.
I went for something slightly in the middle – the sun behind him but still giving light to his left cheek for several reasons. One – I knew direct light into his face at this point of the day would make him squint and be uncomfortable the entire interview which meant I would want him with his back or side to the sun. I initially tried to have the sun directly behind him but when i pointed the camera at him the lens was not happy with the sun directly going into it and I was getting a lot of flare and unwanted light. That clearly wasn’t going to work.
Use Your Environment
This is when I decided to hide my camera in the shade that the building was creating – blocking the sun from entering directly into my lens. The last thing I had to, and this is a doozy and VERY important was make sure my background was not blown out, boring or distracting!
I noticed in the background a prominent tree which also was shady on it’s left side, so I adjusted my shot so that my subject would be on the right and the tree would be framed on the left of the screen and take up a large portion of the left side of the frame. Had that tree not been there then I may have had a very bright background in relation to the subject which would make it a less then desirable shot.
To also help me with eliminating bright background I chose to use a 100mm focal length as apposed to a 50mm since the 50mm would show many more elements in the shot behind my subject. The 100mm compressed my shot (narrowed the amount seen in the sides of the shot) and thus allowed me to look for things to use in the background that were not bright.
The last step was to bring out the eyes of the subject and the overall “glow” of his face. Remember the sun is behind and to the right of him so basically his face is in “shade”. I had the producer hold a reflector – (no assistants by my hip on this one so I gotta put all kinds of interesting people to work, not always a popular move, but my allegiance is to the client!) – to bounce the sunlight coming over his head back into his face and eyes.
This brings his entire exposure up and allows me to bring down the exposure of the entire shot. When I bring down the exposure of the entire shot this leaves the background even more subdued (darker) and not distracting and lets my subject pop even more.
And there you go. A solid shot in just a matter of minutes with loads of obstacles and constraints. To recap in a nutshell, this was the process.
Recap
1)I have to sit him on this bench 2)I can’t have the sun in his eyes so I’ll turn him around so his back is to the sun 3)Tried and failed with sun directly behind him so I hid behind building and had him face to his left a bit 4)All the while I’m looking for a BG that will not be blown out and chose a 100mm focal length so that very little elements will be seen in the background 5)Fill in his face with a reflector and expose for his face.
All done. High Five’s all around. I go get a drink and know I’ll have to go through that quick thinking again a few more times though out the day 🙂 Gotta love it!
Hindsight 20/20
Now that I look back and have more time to think, what could have I done better? Well a lot of things but 2 things stick out in my mind. One. The reflector could have been higher up so that light was not bouncing from below, which is an unnatural look. Two – the sun is a bit strong on the side of him and since I would not have been able to diffuse this with the time constraint (which would be optimal) I could have played with the angle just a bit more so that the sun is a bit more behind him and less on his cheek.
So these are the kinds of challenges you may find yourself dealing with. It changes from shot to shot and each one has new obstacles. The more you do it the quicker you get at diffusing the bomb. Now go out and cut some wires yourself. It may blow up but that’s how we improve.
DID YOU FIND THIS HELPFUL?
HOW DO YOU HANDLE THESE SITUATIONS?
SHARE AND LIKE ON THE LEFT OF THE PAGE

